
How to set up Google Analytics for your QR codes?
Connect your QR codes to Google Analytics (GA4) to see the traffic, engagement, and conversions your scans drive, alongside the rest of your marketing. This guide covers both setup levels: account level for one property across all your codes, and folder level for tracking clients, regions, or campaigns separately.
Before you start
- Google Analytics integration is available on Starter and higher plans. Free users need to upgrade first.
- Only page-type QR codes can be tracked (digital business cards, business and product pages, forms, event pages, coupons, menus, image galleries, PDF galleries). These are dynamic by default. Static or direct-action codes (plain text, phone, email, SMS) have no display page for Google Analytics to load and cannot be tracked this way.
- You need a GA4 property already created in Google Analytics.
Step 1: Get your GA4 Measurement ID
- Sign in to Google Analytics.
- Click the Admin gear icon in the bottom-left corner.
- Open Property settings, then Data collection and modification.
- Click Data streams and select your web data stream.
- Copy the Measurement ID. It looks like
G-XXXXXXXXXX.

Step 2: Add the Measurement ID in QRCodeChimp
Choose the level that matches how you organize your work.
Option A: Account level
Use this when you want one GA4 property to cover every QR code in your account.
- Log in to your QRCodeChimp account and open your Dashboard.
- Go to Ads & Analytics Integrations under the Settings menu on the left panel.
- Scroll to the Add Google Analytics section.
- Paste your Measurement ID into the Google Analytics ID(s) field and click Save.

Option B: Folder level
Use this when different clients, regions, or campaigns need to report into their own property. This is the setup most agencies and multi-location teams use. For a fuller walkthrough of the agency use case, see tracking scans and analytics separately for each client.
- Open your QRCodeChimp Dashboard and click Folders.
-
Find the folder you want to track, click the three-dot More Options menu, then click Ads & Analytics Integrations.
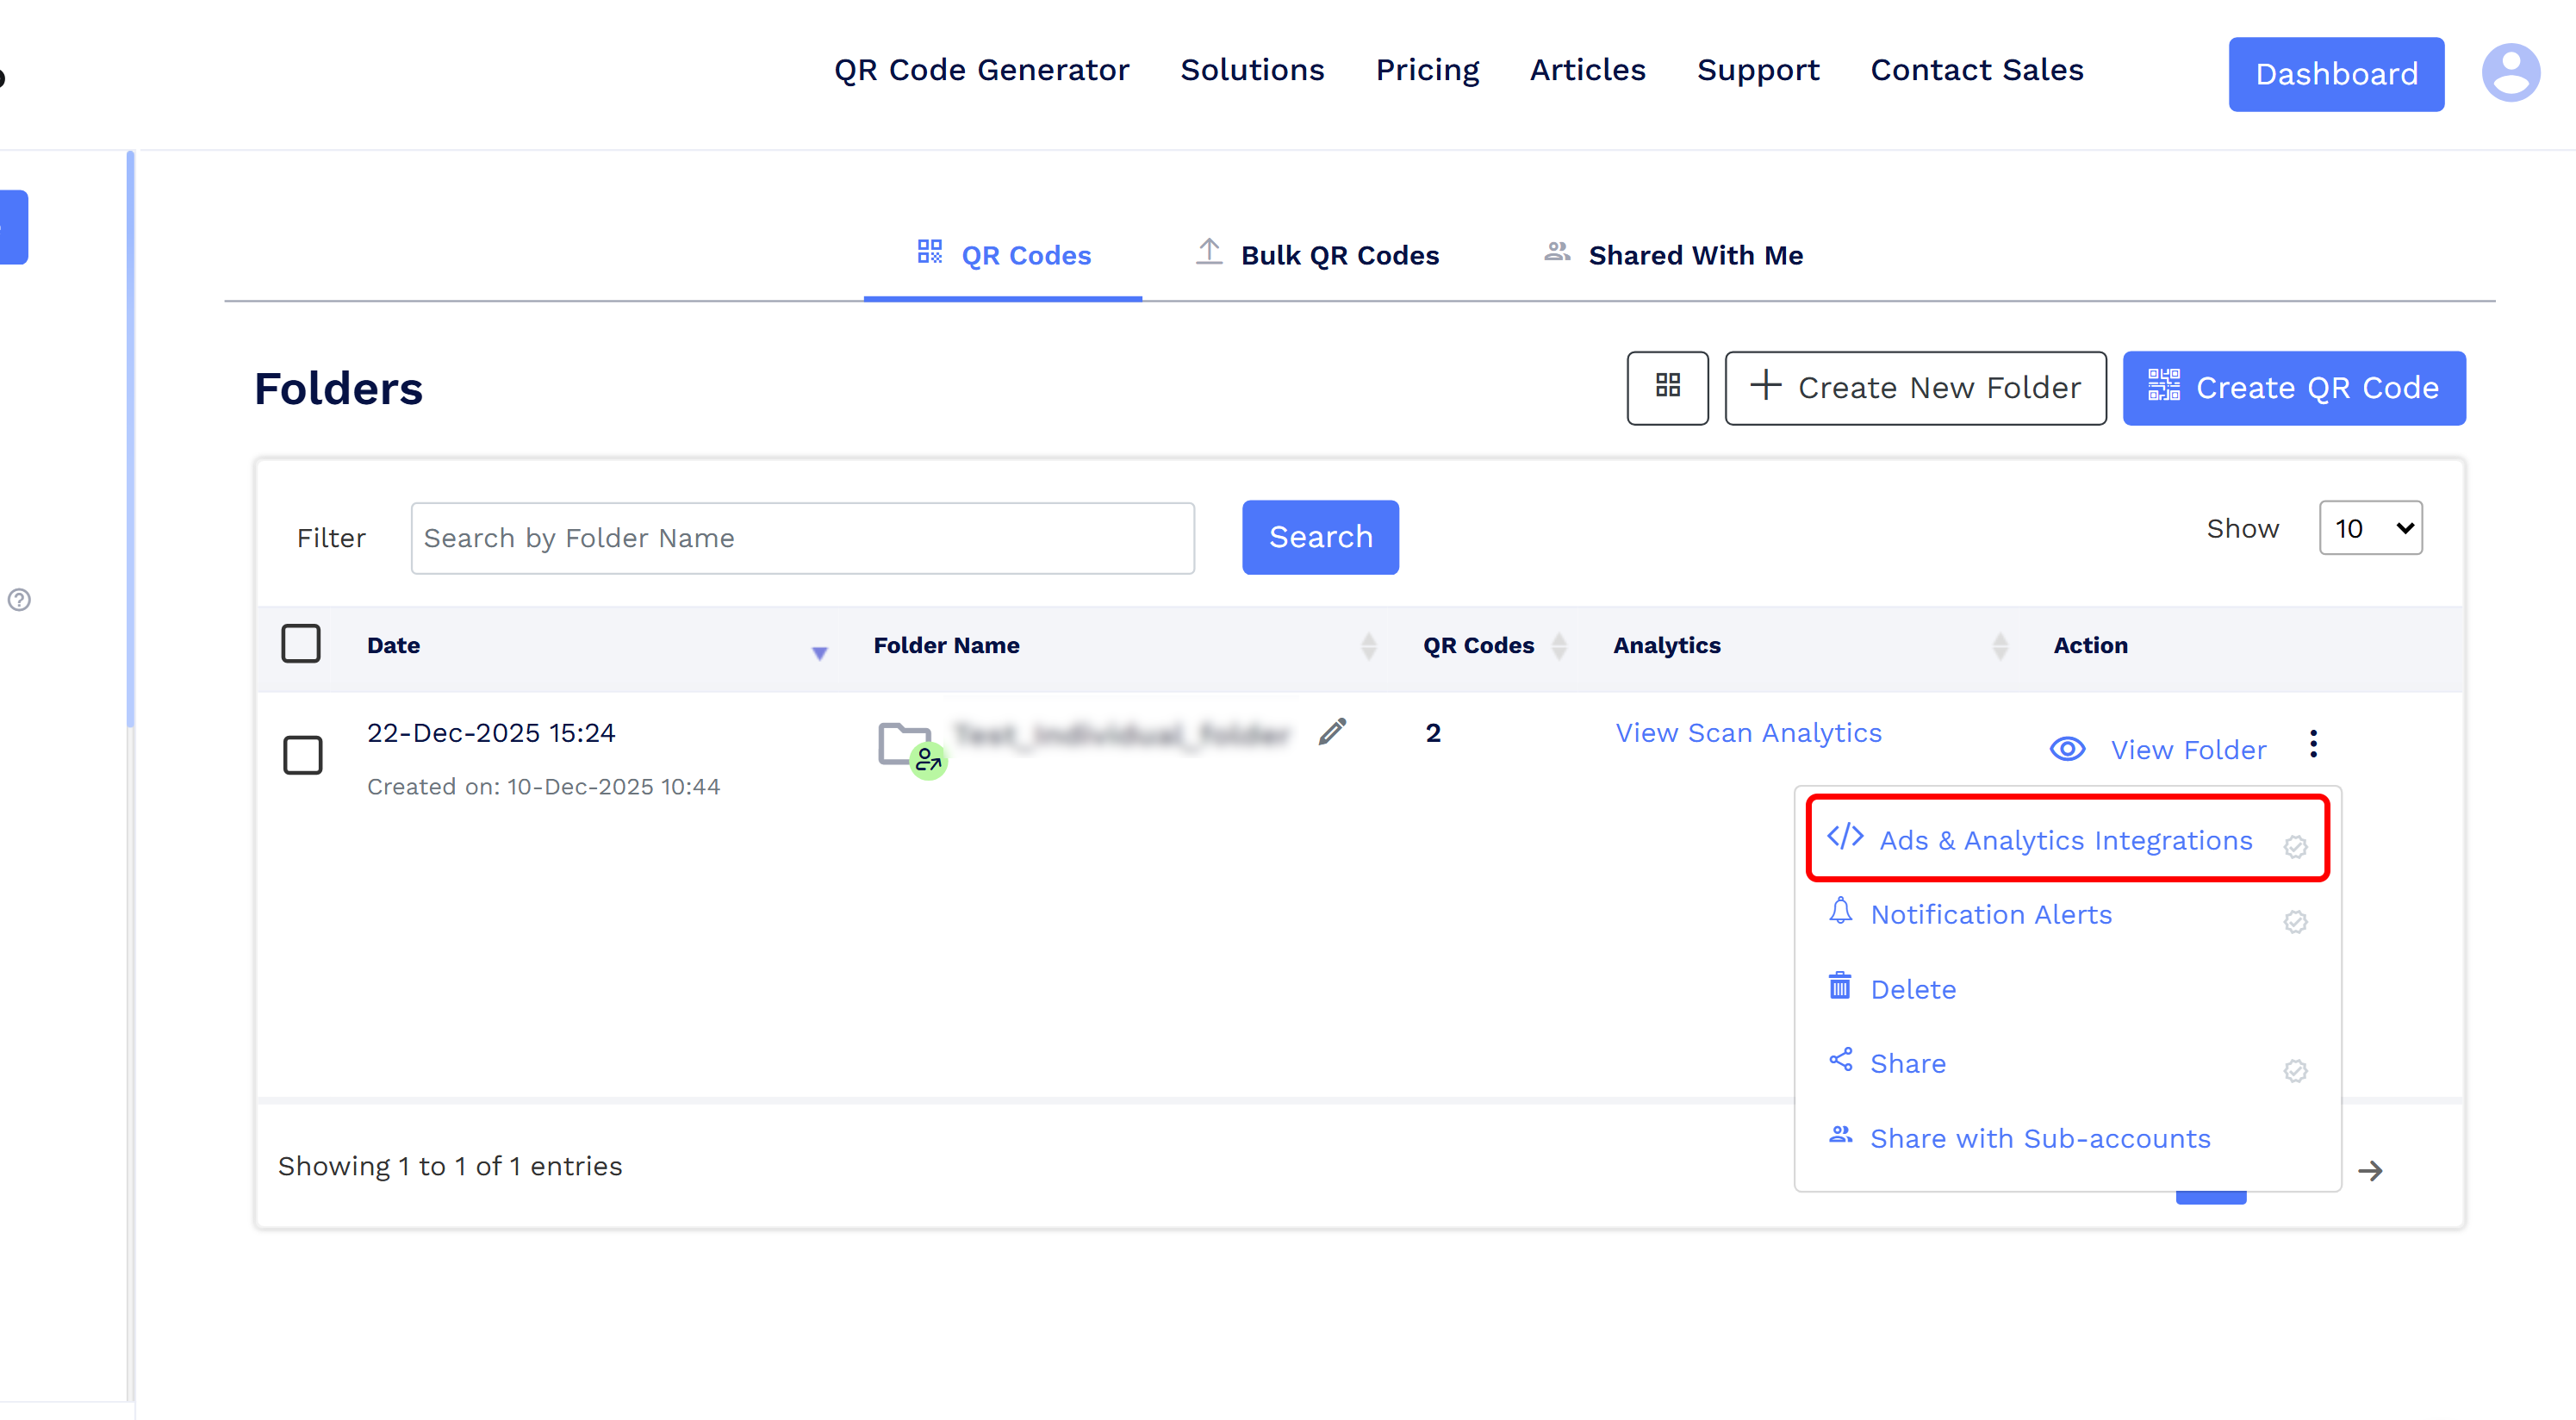
- Paste the Measurement ID into the field and click Save.

Step 3: Verify it is working
- Scan one of your page-type QR codes on a phone.
- In Google Analytics, open Reports, then Realtime, and confirm the visit appears. Standard reports can take up to 24 to 48 hours to populate, so Realtime is the fastest check.
Note: Google Analytics only records scans from the moment you connect the Measurement ID. Scans that happened before setup will not appear.
Good to know
- QR traffic shows as "Direct" by default. A scan carries no referring website, so Google Analytics files it under Direct. To label scans by placement and campaign, add UTM parameters to the code's URL. See How to set up UTM tracking.
- Integration is one-directional. QRCodeChimp sends scan visits to Google Analytics. Your scan-level data (total scans, unique scans, location, device) still lives in the QRCodeChimp Analytics dashboard.
Troubleshooting
Scans not showing up in Google Analytics? Work through these:
- Wait time. Standard reports lag by 24 to 48 hours. Check Realtime first.
- Wrong property. Confirm the Measurement ID belongs to the GA4 property you are viewing, especially if you manage several.
- Wrong code type. Static or direct-action codes cannot be tracked. Confirm you are using a page-type (dynamic) QR code.
- Before-integration scans. Data only starts from the moment the ID was connected.
- Consent settings. If a visitor rejects analytics cookies, that visit may not be recorded.